

Posted by Karl on Sep 1st 2016
How to Create Shaving Lather
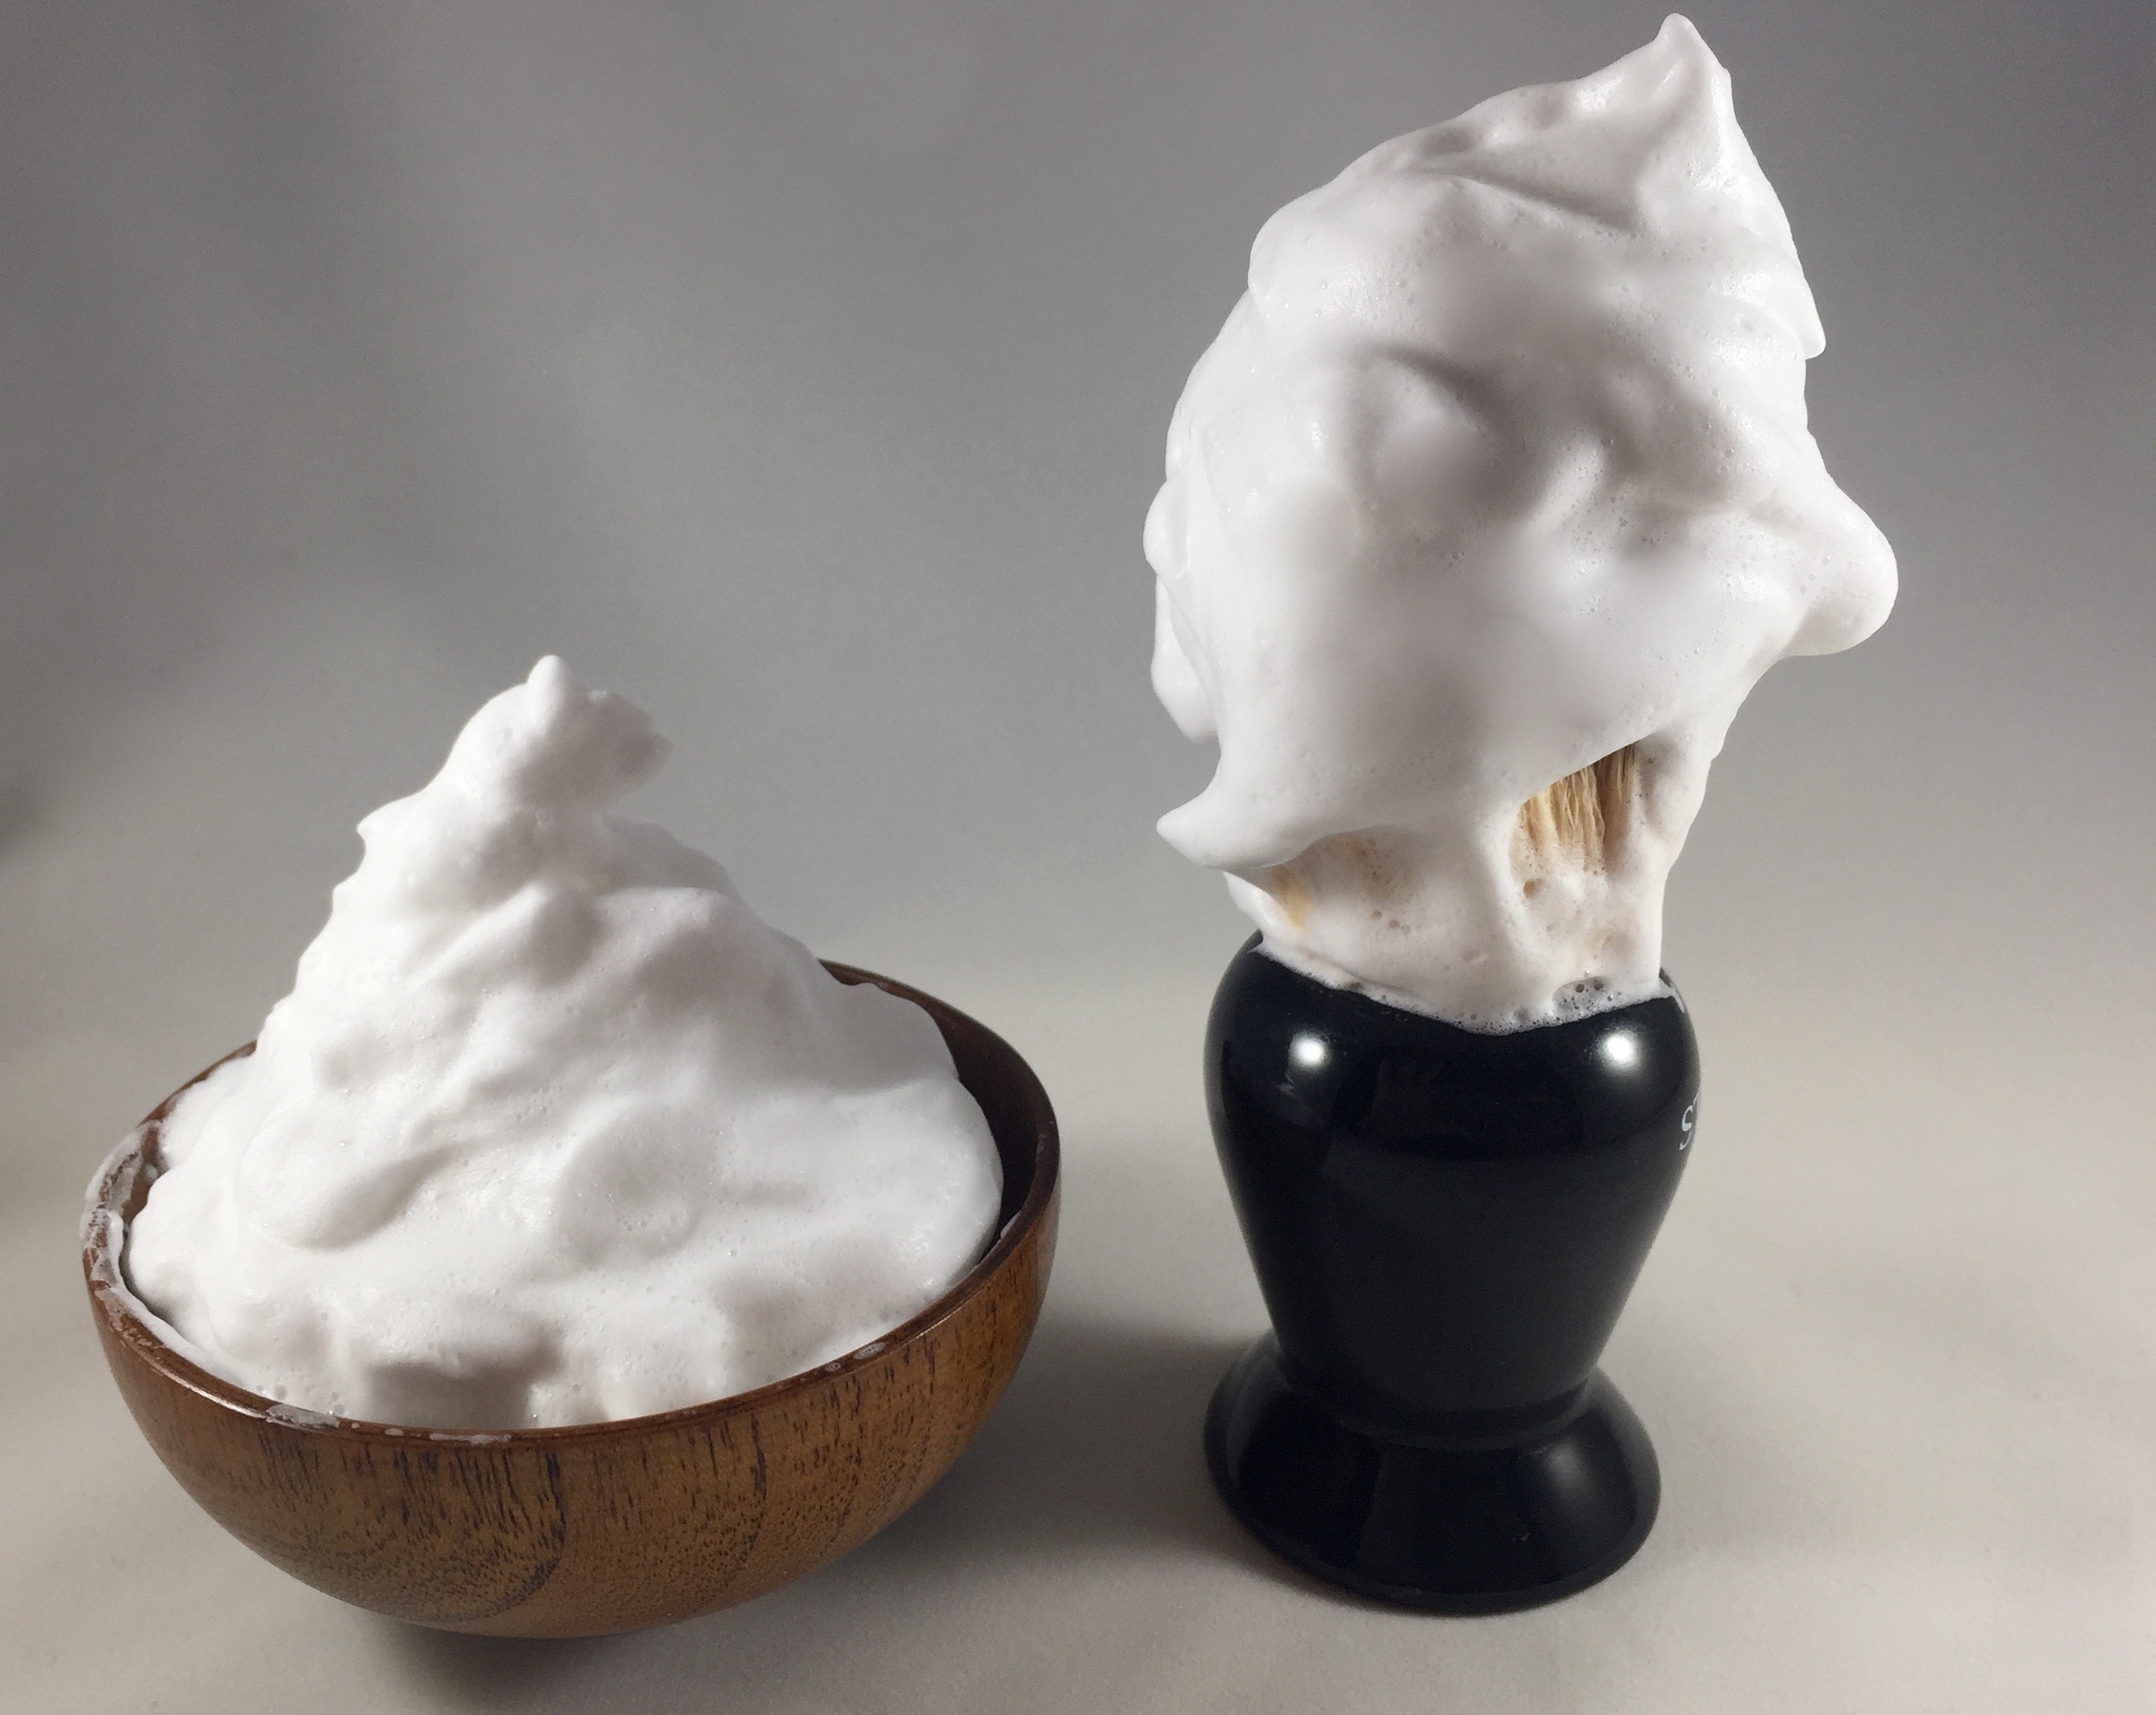
New wet shavers often initially have difficulty creating an optimal shaving lather. The lather may be too thin and runny or it may be too thick, dry and perhaps even pasty. Creating a perfect shaving lather isn't hard, but it does require some practice. A perfect lather should be wet and have a glassy sheen. There should be no large bubbles, and it should be able to easily maintain its form, like the lather in the picture above. Keep in mind that the perfect lather is exactly half-way between too much water and not enough water.
We're going to want to start by loading the brush and then adding water a few drops at a time, while vigorously working the soap into a lather, until the perfect texture is achieved. With a little practice and an excellent soap (like Crowne & Crane shaving soap), this process will take less than a minute to achieve.
A lot of people claim that there is a best way to make lather. Some swear by face lathering, others insist on bowl lathering, others always use a scuttle or even create the lather in their hand. The truth is: There is no one "best" way to make shaving lather. If you have found a way of creating lather that works best for you, then that's the best way. However, the two most common methods to create a great shaving lather are called bowl lathering and face lathering. Here are the steps:
- Prepare the brush. If you are using a natural hair shaving brush such as a badger, boar, or horse hair brush, then allow the bristles of the brush to soak in warm water for a minute or two prior to creating your lather. For synthetic brushes this step is optional, but you should still thoroughly wet the brush prior to use.
- Load the brush. Take the brush and shake most of the water out of it over the sink, leaving the brush damp rather than dripping wet. If you are using a shaving cream, simply put an almond-sized dollop of shaving cream on the end of the bristles. If you are using a hard shaving soap or a "croap" (soap that is soft, but not as soft as a cream), then make circular motions on the soap using light to medium pressure on the brush for about 15 to 30 seconds, until the brush has loaded a good amount of product into its bristles. If you sense that the soap is getting a thick, pasty feeling, wet your fingers in water and allow a few drops to fall on the tips of the bristles and resume loading the brush. At the end of this process, there should be sufficient soap loaded into the bristles for a three-pass shave. At this stage, the soap in the brush has reached a stage called "proto-lather."
- Create the shaving lather. Now that we have a good amount of proto-lather in the brush, we are ready to create the final shaving lather. You can choose to perform this final step in a shaving bowl, mug, or scuttle, in which case we call this "bowl lathering." Alternately, we can build the lather directly on the face, in which case it is called "face lathering." In either case, this involves moving the brush in a vigorous circular motion, pausing from time to time to drizzle a few drops of water onto the brush until the lather has a rich and creamy texture. The texture should have the consistency of whipped cream or yogurt, depending on your preference. At this point there should be no large bubbles left in the lather, and the lather will have a smooth and uniform appearance. The lather should be very moist, smooth, and have a shiny appearance when light strikes it.
- Lather your face. We are now ready to lather for shaving. The lather should first be applied to the face with circular strokes. If you were face lathering, you've already been doing this. This ensures that the whiskers are coated on all sides by the lather and are fully conditioned and softened. In this final step, we will use paint brush strokes to apply an even coat of lather to all of the areas that we intend to shave. We're ready to go. Just repeat this last step for each pass. Don't be tempted to shave areas where the lather has been removed. Unlike Crowne & Crane shaving soap, some shaving soaps have very little residual slickness, and razor burn can result from this practice. Remember, that getting the best results from a wet shave is the result of gradual beard reduction, not rapid beard removal. Use no to very light pressure on the razor. On the first pass, shave with the grain. Rinse your face and lather your face again, but shave the second pass across the grain of the beard. Rinse and lather your face once more, and for the third pass, shave against the grain. After the third pass, you may find that you have a very smooth and close shave. If you find that there are some small areas that need a little more attention, simply grip the brush near the base and squeeze out the last of the lather from the brush and use that lather for your touch up areas.
Happy Shaving!
Karl